Making Low Budget look like Big Budget

We all agree that lighting is everything in cinematography. And, naturally, that leads us to think that spending more cash is the only way to light well. Unfortunately, due to a host of factors fate usually conspires against a DP’s budget. But fear not! Even when you don’t have every element or modifier at your disposal, big budget looks can still be had. Controlling the light can be done with relatively very little if you know how to get the most out of your camera, your available resources, and your post workflow. The following article is a look at how you can take what’s available to you and make the most of it.
This past July I began working as director of photography for a good friend of mine’s production company, CineVeliz. Director Pablo Veliz is a veteran of the independent cinema scene having shot 6 feature films; each with international distribution. You can find out more about CineVeliz and Pablo’s films at the company Website. One of our first jobs working together was on a series of commercials for broadcast in the South Texas market for a law firm specializing in helping immigrants with their paper work. The turn around was to be quick, and all of our locations were exteriors. The budget was low, so our lighting equipment was limited to a 6×6′ frame with a silk, repurposed shower curtains strung together to form a make shift highlight silk, flex-fill, and a 1K LED. A limited set up for any kind of shoot, let alone one where every shot was to take place under the hot south Texas sun. I opted to use AbelCine’s ABNorm picture profile on the FS100. I knew we would be facing a lot of high contrast situations and without knowing if there would be time for a proper grade, it seemed appropriate to shoot with a picture profile that gave us a broader range with out delivering flat footage to the client. ABNorm’s look right out of the camera is fantastic with great skin tones. It’s ideal for projects like this one where you don’t know who will be handling the post color.
The shoot consisted of two basic scenes: first was a small backyard high school graduation celebration, and the second was a subtle tracking shot featuring the client on the San Antonio River Walk. During our scout the day before, we chose a location within walking distance of the San Antonio Film Commission office which allowed us quick access to the necessary officials should any trouble arise. The scout also revealed that this particular location was relatively shaded through out the day and we would be able to roll for the better part of the morning without having to worry about the sun punching through. With this in mind, the cowboy framing allowed us to place the 1K LED closer to our talent coming from camera-left, which helped to create more of a wrap across his face as opposed to an even fill that was naturally occurring. We had a PA stand just behind him and to the right with some flex fill to give the talent an edge. Once we had gotten the coverage we needed for the 4 different spots we were shooting, we moved on to the location for the first-half of the spots. The backyard had absolutely zero tree coverage from the sun, so we were facing the daunting task of trying to keep the lighting consistent and attractive looking with only a 6×6′ frame. Luckily the patio had a wooden truss covering the majority of it. We draped shower curtains across the top of the covering to cut down and diffuse the direct sunlight. We then staged all of the action under it and used the 6×6′ frame with the standard silk as a bounce to key the action. We started with a wide shot then moved in for OTS coverage of the dialogue; repositioning the frame for the back light on each set up, and using the 1K LED as the key. I had to use 1/8th minus green to help improve the skin tones under the 1K LED as well as some spun diffusion to soften it up. A small wall of negative fill was put up to help create some contrast on the talent’s faces under the harsh sun.
Despite the quick turn around, I was pleased to find out that I would be able to do a quick grade on the ABNorm footage. I knew that despite our efforts, some subtle relighting was going to be required to bring out the best from the ABNorm footage. I was given a ProRes422 master to grade with Colorista II via AECS5.5.
Shot 1:
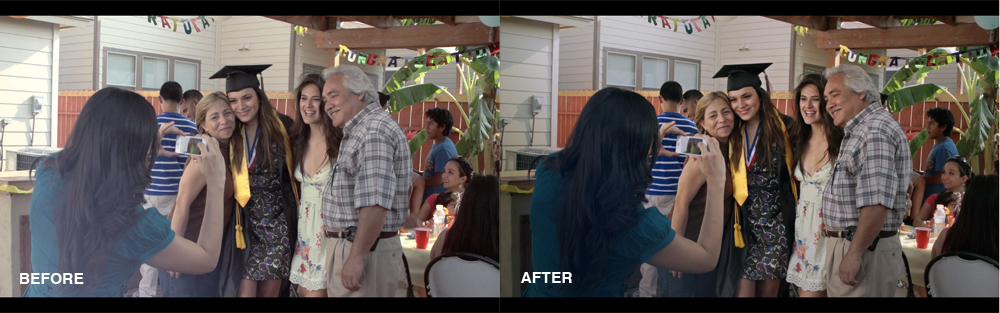
As you can see, with out a client monitor on set, we missed a huge lens flare which ruined a good chunk of the lower left hand corner of the frame. A secondaries mask was used to bring the contrast back into that area of the frame. Luckily this shot was on screen for a split second so not all was lost. I also increased the exposure on the family with another mask as well as improved the over all saturation and highlight retention.
Shot 2:
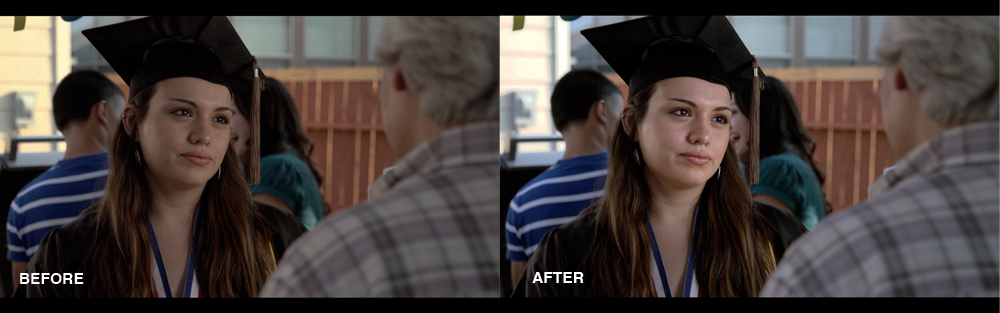
The second shot in the sequence had a bit of a yellow cast to it over all which was eliminated in the master controls. I then brought up the exposure on the actress’s face in order to bring it out against the background.
Shot 3:
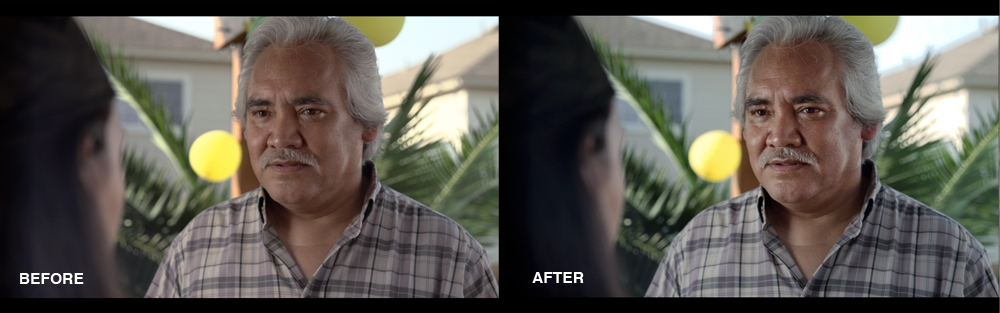
There was yet another flare issue in this shot which was brought down with a mask in post. The general yellow cast was also removed and the contrast on the actor’s face was bumped up to help him stand out.
Shot 4:
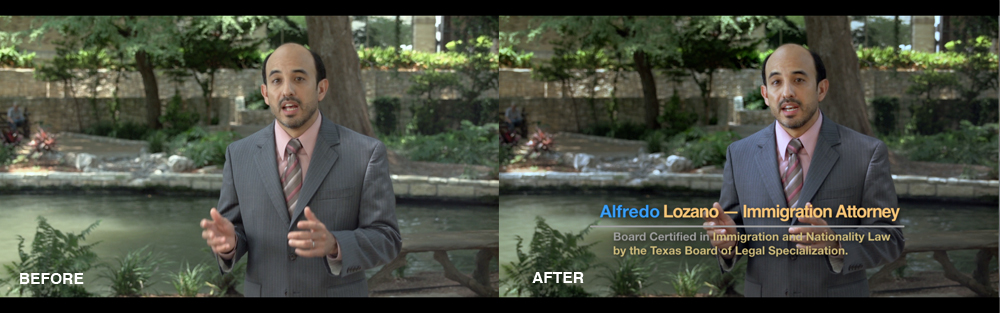
For the final shots in the spot the master exposure was dropped while a secondary mask brought the talent back up. This helped separate him from the background and improve the limited lighting set up we used. Colorista II’s pop feature helped to bring out the face even further from the background.
Overall, I was pleased with the look ABNorm gave straight out of camera. It tended to have a bit more yellow in the image than I would have liked and could use a bit more contrast, but in the end it took me less than 30 minutes to improve on what was already a great image. Had I shot with a flat profile I would have needed a bit more time to finesse the image.
Hopefully this situation shows you how, despite having very little to control the light with, you can still succeed in delivering a product that will please your client. Just remember to focus on choosing the right locations, time of day for each scene, and know what you are capable of pulling off; also, keep an eye out for every day items you can repurpose to improve your lighting. With these techniques at your disposal, and a fair amount of determination, great images can be had, even on the smallest of budgets.
Thanks to Marshall Dungan for his writing insights.
New Product